After my system was quietly humming away for years it was time for an upgrade. One part was concerning the storage system whilst the other had to do with my video card.
Storage Upgrade
I remember my very first build having used a 80GB disk for the recordings. A lot has happened in the meantime and capacities are up by orders of magnitude. The sweetspot currently being in the 3-4TB class. Drive storage has continually grown in my system, sometimes by adding an additional drive and in some instances by replacing a couple drives by a newer model of higher capacity. We all know by now that the only thing not having kept up was the speed of the drives. The answer came in the form of SSD drives a few years ago.
The first SSDs hitting the market suffered from the same set of problems that any new technology does in its infancy. Poor reliability paired with high prices and a rather bad support – in this case the operating systems that were not capable of dealing decently with SSDs.
By now most of these problems are gone. While my system would not get a huge performance boost in its normal workload I still liked the idea of having a fast system disk.
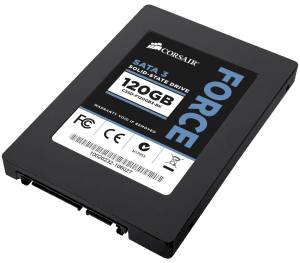
The upgrade came in the form of a Corsair SSD with 128GB capacity. So far the system has performed flawlessly. I only have the system run an occasional
to manually force TRIM on my root drive.
Again, I think on a system such as a MythTV backend, an SSD makes little sense. Sure, database acccess is much faster, but with todays amounts of memory that is likely in RAM anyway. And with all recordings and videos sitting on a large conventional disk, there is litte advantage with an SSD. If there’s other workloads of course it may look like a different game alltogether.
What has really dramatically improved is the performance of VMWare. Windows in a virtual machine stresses the hard disk quite a bit. Having a fast disk made a large difference and hence, backing up bluray disks is much more fun.
Graphics Upgrade
My proven GeForce 7200 graphics card suddenly started to behave strangely. At first I thought it was something else because the entire system crashed. Only after quite some digging in log files I realized that it must be the GPU. Hardware failure after all these years 😉
So I was in for new video card. Based on my experience I had the following wishlist:
- NVidia based card
- HDMI
- VDPAU support
- passively cooled
- single slot cooler
NVidia because their drivers under Linux have never let me down. They work flawlessly even with my dual monitor/Plasma TV setup. HDMI because I wanted to run digital audio to my TV across that one cable. VDPAU to offload video decoding to the GPU for my 2GHz Core2Duo is not quick enough with heavy HD decoding. Passive cooling is a must because the tiny fans on low end GPUs fail so quickly its not even funny. The single slot cooler simply because I hate to give up a slot for a cooler.
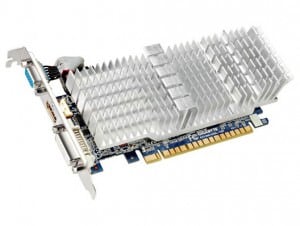
I found everything in the form of the Gigabyte GT-610 minus the single slot cooler. Luckily it only blocks a regular PCI slot that I no longer need since I upgraded to PCIe based DVB-C.
The card offers HDMI, DVI and a VGA connector.
Installation
Installation under Mythbutu 12.04 was straightforward:
- deactivate NVidia drivers in Mythbuntu control center
- remove old GeForce video card
- drop in new GPU
- reactivate Nvidia drivers
Because the video cards are so different the use a different set of drivers. Hence it is important to always deactivate/uninstall the one currently in use when upgrading the GPU.
In mythfrontend VDPAU GPU acceleration for video decoding can be turned on in the settings. On my Core2Duo based system this showed a drop in CPU usage for a HD video from close to 200% to roughly 20% CPU usage. No stuttering and perfect quality.
Sound over HDMI
To get the sound to play across HDMI one needs to select the HDA NVidia card in alsamixer by pressing F6. The video card should automatically show up as a new sound device. All that was necessary was to activate the S/PDIF sound in alsamixer.

