Archiv des Autors: simeli

Vanilleeis

Vanilleeis

  • 500 ml Rahm
  • 500 ml Milch
  • 2 Stk. Vanilleschote (Tahiti)
  • 25 g Glukosesirup
  • 200 g Zucker
  • 12 Stk. Eigelb
  1. Vanillestangen auskratzen und mit dem Glukosesirup, Milch und der Sahne langsam aufkochen.
  2. Eigelbe und Zucker über Wasserbad schaumig schlagen.
  3. Milch/Sahne noch warm (aber nicht heiss) duch ein Sieb in die Eigelbmasse geben und alles noch einmal zur Rose abziehen.
  4. Alles mind. 24h in Pacojet Becher einfrieren.

Pouletbrüstli im Blätterteig

Pouletbrüstli im Blätterteig

Pouletbrüstli im Blätterteig

  • 300 g Spinat frisch
  • etwas Olivenöl
  • 1 Stk. Zwiebeln (gewürfelt)
  • 1 Stk. Knoblauchzehen (gepresst)
  • 1 TL Senfsamen (hell)
  • 250 g Blätterteig (viereckig ausgewallt)
  • 1 Stk. Eiweiss
  • 2 Stk. Pouletbrüstli
  • etwas Senf
  • 10 Stk. Speckscheiben (geräuchert)
  • 1 Scheibe Käse (z.B. Chili-Raclettkäse, Emmentalter)
  • 1 Stk. Eigelb
  1. Ofen auf 220 °C Umluft vorheizen.
  2. Olivenöl in grosser Pfanne erhitzen, Zwiebeln, Spinat, Senfsamen und Knoblauch andünsten. Sobald der Spinat zusammengefallen ist vom Herd nehmen.
  3. Blätterteig viereckig auswallen, mit Eiweiss bestreichen und in zwei Rechtecke schneiden.
  4. Je ein längliches Spinatbett mit je einem 1/4 des Spinats auf die Teige geben und die Speckstreifen quer darüber legen.
  5. Pouletbrüstchen mit Senf bestreichen und quer auf die Speckstreifen legen, die Käsescheibe obendrauf legen, den Speck rundherum wickeln und den restlichen Spinat darauf verteilen. en Teigmantel schliessen, gut andrücken, mit Eigelb bestreichen und mit einer Gabel zwei Mal einstechen. Mit Teigresten verzieren.
  6. Den Teigmantel schliessen, gut andrücken, mit Eigelb bestreichen und mit einer Gabel zwei Mal einstechen. Eventuell mit Teigresten verzieren.
  7. Bei 220 °C für ca. 25 Minuten backen. Dann die Temperatur auf 250 °C erhöhen und weitere ca. 10 Minunten backen.
  8. Diagonal durchschneiden und anrichten.

Datschi – Kartoffelpuffer

Ob nun als Kartoffelpuffer, Erdäpfelpuffer, Reibekuchen, Reiberdatschi, Reibeplätzchen, Dotsch, Kartoffelpfannkuchen oder Kartoffelplätzchen, eigentlich geht es immer um das selbe.

Datschi – Kartoffelpuffer

  • 16 Stk. Kartoffeln festkochend (mittlere Grösse)
  • 500 g Quark
  • 1 Stk. Zwiebeln
  • 4 Stk. Eier
  • 4 EL Weissmehl
  1. Zwiebel hacken und mit Quark, Eiern und Mehr vermengen. Kartoffeln schälen und roh in die Quarkmasse reiben.
    Anschliessend mit Salz, Pfeffer und Muskat abschmecken.
    In einer Bratpfanne mit Butterschmalz goldbraun ausbacken.

Am besten passt dazu Apfelmus.

AirPlay on Ubuntu

I wanted to have the capability to play music from my phone wirelessly to my home. I already have an AirPort Express station that takes care of that. I recently purchased a BOSE Soundlink mini for my kitchen. The Bose speaker came out on top for its small size and its stunning sound quality. Its largest drawback though being that it is incompatible with AirPlay. The second drawback is that its AUX input can only be accessed directly on the speaker and not dock-like via its charging cradle.

Anyway I figured I could use my AirPort Express to hook up the BOSE speaker and since I already run cables to my stereo from my Mythbuntu server to my stereo I was looking into finding a way to use that as an AirPlay base.

Basically AirPlay is an encrypted protocol to allow vendor lock in. In this case Apple. The community managed to reverse engineer the RAOP protocol and so the key is available publicly on the net for example here.

The first solution I found was Shairport which essentially acts as a standalone daemon and is basically plug and play. I am not going to copy paste all the steps necessary as they are very self explanatory on the Shairport site.

A bit later I found that MythTV and Mythbuntu for that matter provide built in AirPlay support. You just need to download the key and have MythTV start the service at launch. All that is necessary is explained here and applies also to my Mythbuntu 12.04 or Ubuntu 12.04 for that matter running MythTV 0.25.

It remains to be seen if this still works when I update this spring to 14.04LTS.

Upgrades to MythTV system

After my system was quietly humming away for years it was time for an upgrade. One part was concerning the storage system whilst the other had to do with my video card.

Storage Upgrade

I remember my very first build having used a 80GB disk for the recordings. A lot has happened in the meantime and capacities are up by orders of magnitude. The sweetspot currently being in the 3-4TB class. Drive storage has continually grown in my system, sometimes by adding an additional drive and in some instances by replacing a couple drives by a newer model of higher capacity. We all know by now that the only thing not having kept up was the speed of the drives. The answer came in the form of SSD drives a few years ago.

The first SSDs hitting the market suffered from the same set of problems that any new technology does in its infancy. Poor reliability paired with high prices and a rather bad support – in this case the operating systems that were not capable of dealing decently with SSDs.

By now most of these problems are gone. While my system would not get a huge performance boost in its normal workload I still liked the idea of having a fast system disk.

Corsair Force3 SSD

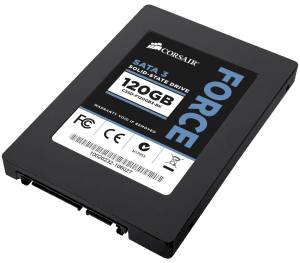
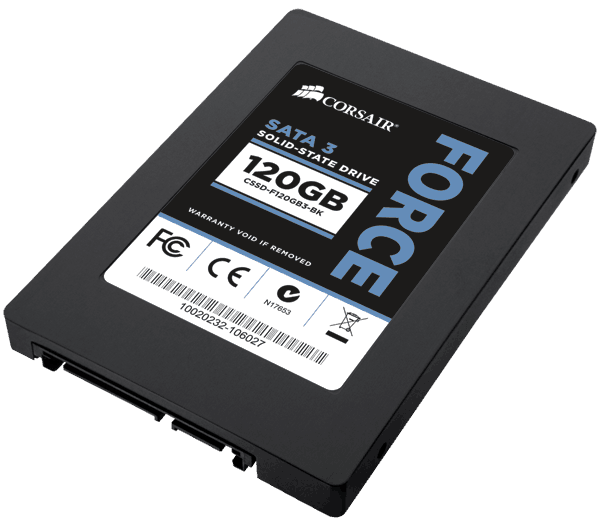
Corsair Force3 SSD 120GB

The upgrade came in the form of  a Corsair SSD with 128GB capacity. So far the system has performed flawlessly. I only have the system run an occasional

# fstrim -v /

to manually force TRIM on my root drive.

Again, I think on a system such as a MythTV backend, an SSD makes little sense. Sure, database acccess is much faster, but with todays amounts of memory that is likely in RAM anyway. And with all recordings and videos sitting on a large conventional disk, there is litte advantage with an SSD. If there’s other workloads of course it may look like a different game alltogether.

What has really dramatically improved is the performance of VMWare. Windows in a virtual machine stresses the hard disk quite a bit. Having a fast disk made a large difference and hence, backing up bluray disks is much more fun.

Graphics Upgrade

My proven GeForce 7200 graphics card suddenly started to behave strangely. At first I thought it was something else because the entire system crashed. Only after quite some digging in log files I realized that it must be the GPU. Hardware failure after all these years 😉

So I was in for new video card. Based on my experience I had the following wishlist:

  • NVidia based card
  • HDMI
  • VDPAU support
  • passively cooled
  • single slot cooler

NVidia because their drivers under Linux have never let me down. They work flawlessly even with my dual monitor/Plasma TV setup. HDMI because I wanted to run digital audio to my TV across that one cable. VDPAU to offload video decoding to the GPU for my 2GHz Core2Duo is not quick enough with heavy HD decoding. Passive cooling is a must because the tiny fans on low end GPUs fail so quickly its not even funny. The single slot cooler simply because I hate to give up a slot for a cooler.

I found everything in the form of the Gigabyte GT-610 minus the single slot cooler. Luckily it only blocks a regular PCI slot that I no longer need since I upgraded to PCIe based DVB-C.
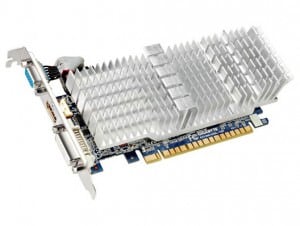
Gigabyte GT610 Video Card

Gigabyte GT610

The card offers HDMI, DVI and a VGA connector.

Installation

Installation under Mythbutu 12.04 was straightforward:

  • deactivate NVidia drivers in Mythbuntu control center
  • remove old GeForce video card
  • drop in new GPU
  • reactivate Nvidia drivers

Because the video cards are so different the use a different set of drivers. Hence it is important to always deactivate/uninstall the one currently in use when upgrading the GPU.

In mythfrontend VDPAU GPU acceleration for video decoding can be turned on in the settings. On my Core2Duo based system this showed a drop in CPU usage for a HD video from close to 200% to roughly 20% CPU usage. No stuttering and perfect quality.

Sound over HDMI

To get the sound to play across HDMI one needs to select the HDA NVidia card in alsamixer by pressing F6. The video card should automatically show up as a new sound device. All that was necessary was to activate the S/PDIF sound in alsamixer.